5.9 KiB
⚡️ RaspiBlitz-on-DietPi ⚡️
This guide was tested on:
- Odroid HC1
- Odroid HC2 (the same board with a 3.5" 12V HDD)
- Odroid XU4 (with HDMI screen)
- Raspberry Pi 3 B+ (with the default GPIO or HDMI display)
See the hardware comparison.
The HDMI screen tested: https://www.aliexpress.com/item/3-5-inch-LCD-HDMI-USB-Touch-Screen-Real-HD-1920x1080-LCD-Display-Py-for-Raspberri/32818537950.html
Specific instructions and downloads:
General guide for the RaspiBlitz-on-DietPi
Setting up the DietPi OS
Getting started with DietPi: https://dietpi.com/phpbb/viewtopic.php?f=8&t=9#p9
-
Start with an ARM based Single Board Computer listed on DietPi.com.
At least 1GB RAM is recommended.
Look for the SD card image for the specific SBC in the download section. -
Burn the image to the SDCard with Etcher.
-
Insert the SDcard into your SBC.
-
Connect the HDD with a suitably powered adapter.
Aim to use 2 USB ports or a separate power supply to power the HDD for a more reliable setup. -
Power up and log in with the desktop terminal on Linux / MacOS or Putty on Windows:
ssh root@[IP-OF-DIETPI]
password:dietpi -
If you are asked about updating DietPi, go ahead with it. This is not always a straightforward process, but it is best to build on the latest version.
-
In the DietPi software menu install
fail2banand makeOpenSSH serverthe default SSH server.
If there is a screen installed: within the Dietpi-Config menu set the Autostart to7: Automatic login.Changing the SSH server will change the SSH keys again. To clear:
ssh-keygen -f "/home/[your-linux-username]/.ssh/known_hosts" -R "dietpi.IP" -
After every reboot log back in:
ssh root@[IP-OF-DIETPI]
password:dietpi -
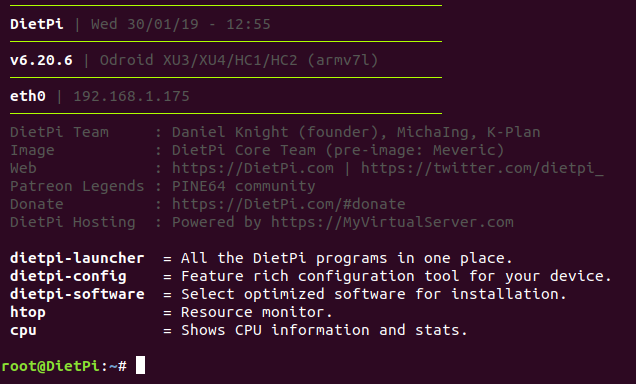
Should end up here on version v6.20.6 or higher:
Run the RaspiBlitz build_sdcard.sh script
-
Use this format to build the SDcard with the Raspiblitz script:
wget https://raw.githubusercontent.com/[GITHUB-USERNAME]/raspiblitz/[BRANCH]/build_sdcard.sh && sudo bash build_sdcard.sh [BRANCH] [GITHUB-USERNAME]
If you are working from a forked repo be aware of that the fork needs to be calledraspiblitzfor the git downloads to work.Example to run the dev branch of @rootzoll:
wget https://raw.githubusercontent.com/rootzoll/raspiblitz/dev/build_sdcard.sh && sudo bash build_sdcard.sh dev rootzoll
This will take a couple minutes depending on your internet connection and the processing power of the SBC. -
After the automatic restart log back in now as
admin:
ssh admin@[IP-OF-RASPIBLITZ]
password:raspiblitz -
From here he setup continues with the RaspiBlitz Setup Process
Useful commands for debugging:
During the Automated setup:
tail -n1000 -f /tmp/DietPi-Update/dietpi-update.log - follow the dietpi-update process
tail -n1000 -f /var/tmp/dietpi/logs/dietpi-automation_custom_script.log follow the output of the build_sdcard.sh
During the RaspiBlitz setup process:
lsblk check the disk partitions
tail -n1000 -f raspiblitz.log - debug logs of bootstrap.sh
sudo tail -f /mnt/hdd/bitcoin/debug.log - continuous monitoring of bitcoind
sudo tail -n100 /mnt/hdd/bitcoin/debug.log - shows the last 100 lines
sudo systemctl status lnd - status of the lnd service
sudo journalctl -f -u lnd
./home/admin/XXdebugLogs.sh - debug log collection on the RaspiBlitz
Excerpts from the [customized dietpi.txt]/alternative.platforms/dietpi/boot/dietpi.txt)
to be used for a fully automatic SDcard building process.
Automate installation with the dietpi.txt
Need to copy to SDcard /boot/dietpi.txt after burning the image with Etcher. IMPORTANT:
- Modifications to /boot/dietpi.txt will not be preserved on reboot .
- Please ensure you edit from the DietPi-RAMdisk location: /DietPi/dietpi.txt
NB: This is intended for advanced users, unless you know what you are doing, do not edit this file. ease use the DietPi programs instead.
NB: Do not remove uncommented lines, as the items are scraped by DietPi programs, on demand.
DietPi-Automation settings, applied on the 1st boot of DietPi, ONCE
Sample:
https://github.com/Fourdee/DietPi/blob/master/dietpi.txt
DietPi-Software to be installed automatically
Requires AUTO_SETUP_AUTOMATED=1
For a list of software index's (ID's), run '/DietPi/dietpi/dietpi-software list'
No limit on number entries, add as many as you need and uncomment the line.
DietPi will automatically install all pre-reqs (eg: ALSA/XSERVER for desktops etc)
install fail2ban
AUTO_SETUP_INSTALL_SOFTWARE_ID=73
install OpenSSH Client
SSH Server Selection:
0=none
-1=dropbear
-2=opensshserver
AUTO_SETUP_SSH_SERVER_INDEX=-2
Custom Script (post-networking and post-DietPi install)
Runs after DietPi installation is completed.
Allows you to automatically execute a custom script at the end of DietPi installation.
Option 1 = Copy your script to /boot/Automation_Custom_Script.sh and it will be executed automatically.
Option 2 = Host your script online, then use AUTO_SETUP_CUSTOM_SCRIPT_EXEC=http://myweb.com/myscript.sh, it will be downloaded and executed automatically. | 0=disabled
NB: Executed script log /var/tmp/dietpi/logs/dietpi-automation_custom_script.log
Find the Automation_Custom_Script.sh loaded with the build_sdcard.sh [here]/alternative.platforms/dietpi/boot/Automation_Custom_Script.sh)
Guide to clone your SD-cards in Windows, MacOS and Linux and shrink the image in Linux:
https://beebom.com/how-clone-raspberry-pi-sd-card-windows-linux-macos/